




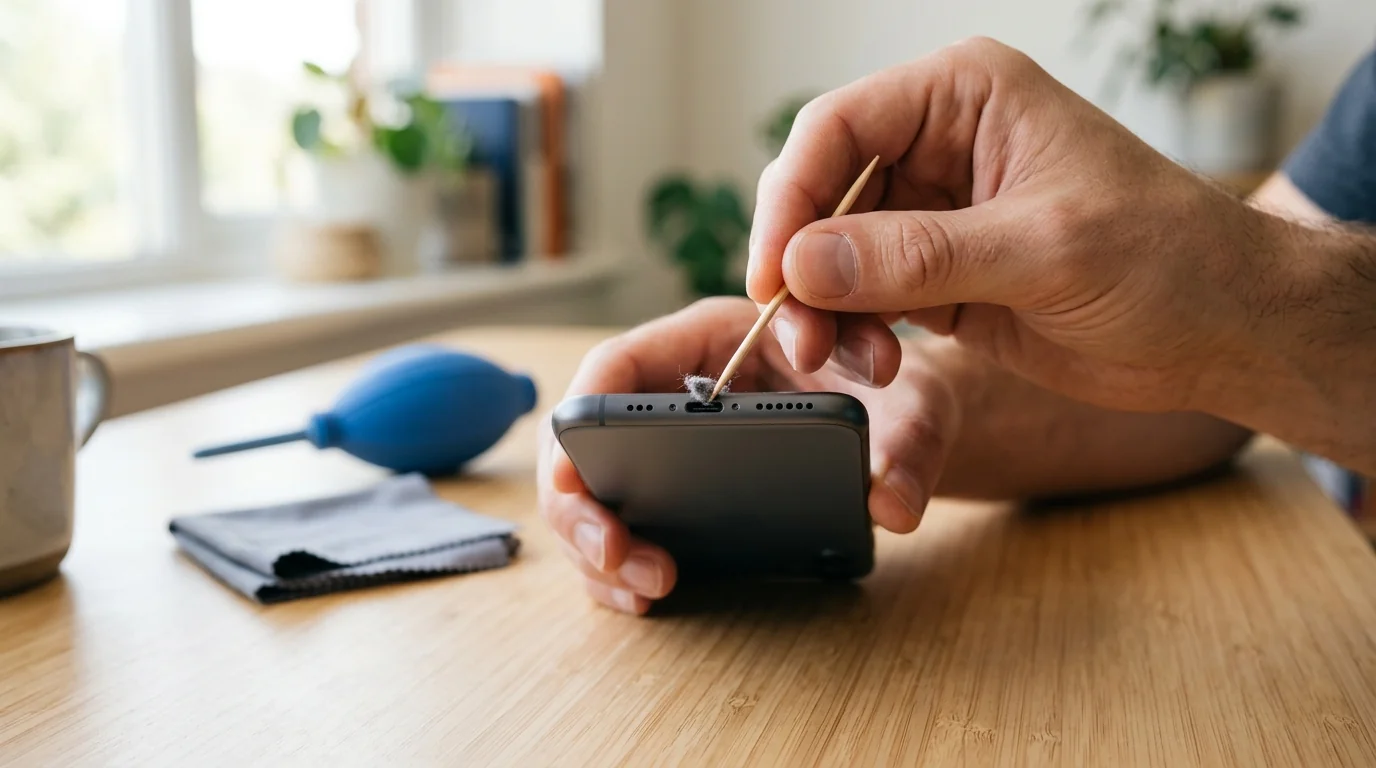
Your phone charges when you hold the cable at an angle, then stops the moment it slips out. If you’re wondering how to clean phone charging port buildup, turn your phone off, inspect it with a light, gently lift lint with a wooden or plastic pick, use gentle air, then test charging. Never use metal or water, and don’t force a tool against the contacts.
Does that loose cable mean you need a repair? Not necessarily, because trapped lint can keep the plug from seating properly. You see, each time you connect your charger, you can press that debris farther into the socket until it gets in the way of a good connection.
But cleaning advice doesn’t always agree. Some guides recommend picks and canned air, while others warn about broken tips, fragile pins or dirt being pushed deeper inside. That matters, so we’ll explain those differences before you decide what to use.
This guide covers the signs of a dirty port, how lint gets packed inside and which tools deserve caution. You’ll get seven cleaning steps, separate instructions for moisture warnings and checks to try when your phone still won’t charge. We’ll also cover when to stop and get help, plus ways to keep more dirt out.
Signs Your Phone Charging Port Is Dirty
Your charger is plugged in, but your phone keeps losing the connection. Does that mean the socket is broken? It could be, but trapped dirt can cause similar trouble, so start by checking how your cable fits and what you can see inside.
Slow or Stop-Start Charging
Slow charging is one clue. You might also find that charging starts, stops and starts again while the cable remains connected. Dust and lint can interrupt the contact your phone needs, although a faulty cable, adapter or software problem can produce charging problems too.
A Cable That Won’t Sit Right
Pay attention to the plug itself. If it no longer clicks into place, sits crooked or falls out, something inside the socket may be stopping it from going all the way in. On a Lightning connector, a gap between the cable’s plastic collar and your phone can be another clue.
Then there’s the cable you have to hold just right. You move it to an angle, charging begins, and letting go breaks the connection again. You might find that your phone accepts certain cables while refusing others, even though packed debris is still interfering with the fit.
Car and Computer Connections Drop
Charging isn’t the only connection that can suffer. If your phone repeatedly disconnects from your car’s audio system or your computer, dirt in the socket could be involved. If your car still won’t connect after a clean, check our guide on Android Auto phone support. You see, that same opening handles those cable connections, so the problem may show up beyond charging.
Do a Quick Flashlight Check
Before reaching for a cleaning tool, switch your phone off and shine a flashlight into the opening. Look for fibers, stuck dirt or a compacted layer toward the rear of the socket. A plug that cannot seat fully, together with visible buildup, gives you a reason to suspect a blockage.
Dirty Port or Damaged Port?
But dirt and damage can overlap. These clues help you decide when cleaning may be worth trying and when you should get the connector checked.
- Loose wobble: Your plug moving around or needing an odd angle can indicate damage, but trapped lint can cause poor fit too. That movement alone doesn’t tell you which problem you have.
- Corrosion or dark spots: These can indicate damage rather than ordinary debris. If you’re unsure what you’re seeing, have your port inspected instead of trying to scrape it clean.
- Unrecognized charger: Your phone failing to detect a charger can point to port damage, though a defective accessory can also be responsible. Try another cable or charger before blaming the socket.
Check what you can see before deciding what you need to remove.
Why Lint Builds Up and Stops Your Phone From Charging
How does a tiny socket collect enough dirt to stop your phone charging? Your charging port is the phone’s most exposed opening, and pocket fibers, dust and loose dirt from bags can find their way inside. You don’t need a large piece of debris for that cramped space to become blocked.
How Each Plug-In Packs the Lint Tighter
The trouble develops as you keep connecting your charger. Each insertion can push trapped material farther into the socket, pressing it against the rear wall instead of removing it. Over time, what started as loose lint can become a hard, compacted layer that keeps the plug from seating properly.
You see, your cable needs to sit in the right position for its small pins to meet the phone’s contacts. When packed debris gets in the way, that contact becomes unreliable. You might lose fast charging or find that certain cables stop working before wired charging fails altogether, as described in an account of a blocked USB-C port.
Why One Cable Still Works
That helps explain why swapping cables can seem to solve the problem for a while. Your phone might still accept one cable while another sits crooked or slips out. The remaining connection doesn’t prove the socket is clear, so checking inside still matters.
“A cable that still works doesn’t mean your port is clear.”
Even New Phones Collect Lint
And your phone doesn’t have to be old to collect lint. One owner reported finding buildup in a phone just two months old, so age alone isn’t a reason to skip the inspection. A fairly new device can still have debris trapped inside its charging socket.
Lint Isn’t the Only Cause
Of course, lint isn’t responsible for every charging fault. Physical damage, a defective cable or adapter, and software glitches can cause similar symptoms, so start with a visual check and remove debris carefully if you find it. If charging remains unreliable afterward, test those other causes rather than repeatedly scraping a socket that may already be clear.
What to Use and What to Keep Out of the Port
Before you reach for whatever fits inside the socket, remember how fragile the contacts are. A tool can be small enough to enter your port and still damage it or leave debris behind. Start with a light so you know what you’re trying to remove.
Tools at a Glance
You also need to know where the advice disagrees. Canned air, cotton and alcohol are disputed, and even toothpicks come with warnings about broken tips and damaged pins. We’ll explain those differences in a later section, but this table gives you the cautions before you start.
| Tool | Use it or skip it | Why |
|---|---|---|
| Flashlight | Use it | Helps you see trapped lint, dirt and signs of damage |
| Wooden or plastic toothpick | Use cautiously | Can loosen packed lint, but may break or damage pins |
| Plastic spudger | Use cautiously | Nonmetal option mentioned for removing compacted lint |
| Hand bulb air blower | Use gently | Can clear loose dust without canned air |
| Canned air | Disputed | Some guides permit brief bursts with the nozzle outside. Apple warns against it |
| Cotton swab or cotton-wrapped toothpick | Disputed – skip by default | Some guides suggest it, but cotton fibers can remain inside |
| Isopropyl alcohol on a barely damp tip | Disputed – skip by default | TechRadar permits it optionally. Other guides reject liquid inside |
| Microfiber cloth | Use on the outside | Cleans the exterior without shedding fibers |
| Metal pins, paper clips, needles or tweezers | Skip them | Can scratch contacts, damage pins or cause a short |
| Paper towels and tissues | Skip them inside | Can deposit fibers in your socket |
| Water and cleaning sprays | Skip them | Moisture and cleaning chemicals can harm your device |
| Blowing with your mouth | Skip it | Your breath can carry moisture into the opening |
| Hair dryer heat | Skip it | Heat can damage your phone and loosen panel adhesives |
Start With the Gentlest Option
You don’t need to use every item listed here. Inspect your port first, then choose a gentle method for the debris you can actually see. If loose dust comes away with a bulb blower, there’s no reason to move on to a pick or liquid.
Keep your phone switched off while cleaning, and stop if your next move would require force. A plug that still refuses to seat properly deserves professional attention rather than harder scraping. The wet-port instructions are separate, because Apple advises against inserting objects or using compressed air to dry a connector.
Choose your tools carefully, then let a light guide your next move.
How to Clean Phone Charging Port Step by Step
Start by checking what is inside your charging port, then use the gentlest method that can remove the debris you can see. The steps below explain how to remove debris while accounting for conflicting advice about picks, canned air and liquids. If you find corrosion, cannot remove lint without force or receive a moisture warning, stop and follow the relevant repair or drying guidance.
1. Power Off the Phone and Unplug Everything
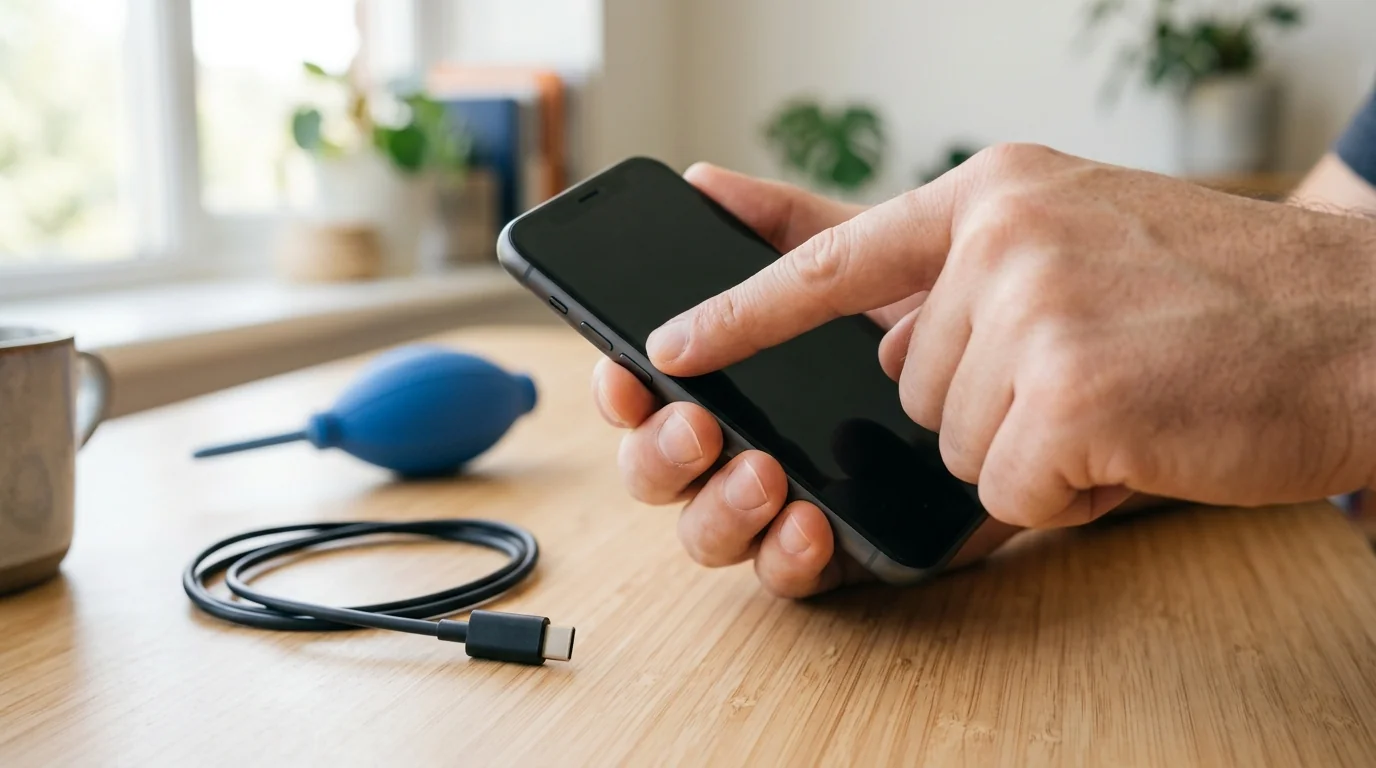
Turn your phone off and disconnect your charging cable before you begin. Remove any accessory attached to the socket too, so you can inspect the opening without a plug in the way. Keep your phone switched off while you work inside the port, including during any optional cleaning with a damp tip.
This matters because your cleaning tool will be close to electrical contacts. A metal object can cause a short, while pressure from any tool can damage the delicate pins. Switching off is an important first action, but it doesn’t make a paper clip, needle or pair of metal tweezers suitable for cleaning.
You see, shutting down and choosing a suitable tool are separate precautions. The guides recommend turning your phone off before cleaning, while several also warn against metal tools altogether. Keep those warnings together rather than treating a powered-down phone as permission to scrape with whatever fits, and leave water and cleaning sprays out of the job.
2. Shine a Light Inside and Find the Debris
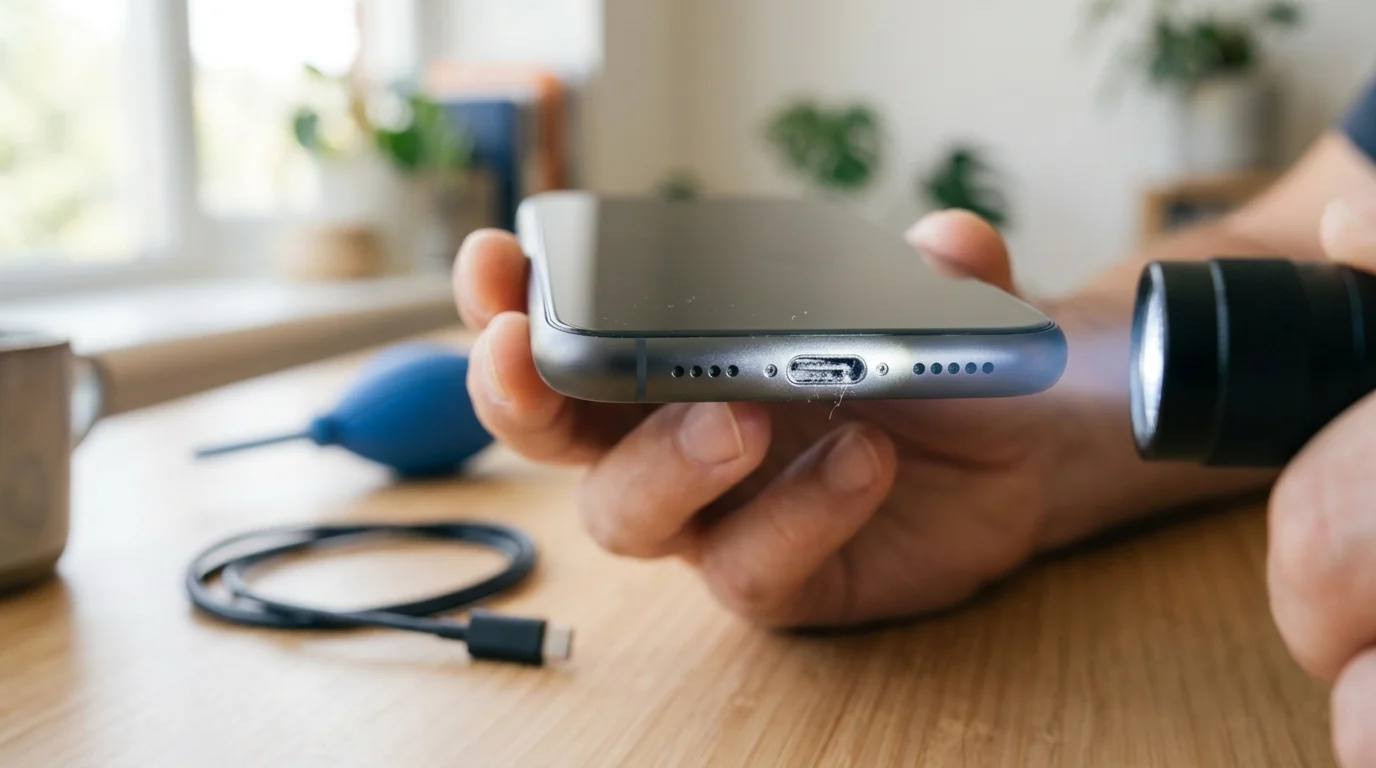
Use a flashlight to examine your charging socket before inserting anything. Look for fibers, stuck dirt or a compacted layer near the rear of the opening. You are trying to identify a blockage that could prevent the cable from reaching its proper position, rather than assuming every charging fault comes from lint.
Think back to how your plug fits. A crooked connector, a cable that falls out or a plastic collar that sits away from the phone can all point to trapped debris. If you can also see buildup inside, that gives you a reason to try careful cleaning, though it still doesn’t rule out damage.
Check for corrosion or dark patches as well, because those can indicate a damaged port. Some guides also describe discoloration when checking for dirt, so appearance alone may leave you unsure what you’re seeing. If that happens, or your phone’s socket was damaged in a drop, get it inspected rather than guessing which surface you should scrape.
3. Clear Loose Dust With Gentle Air
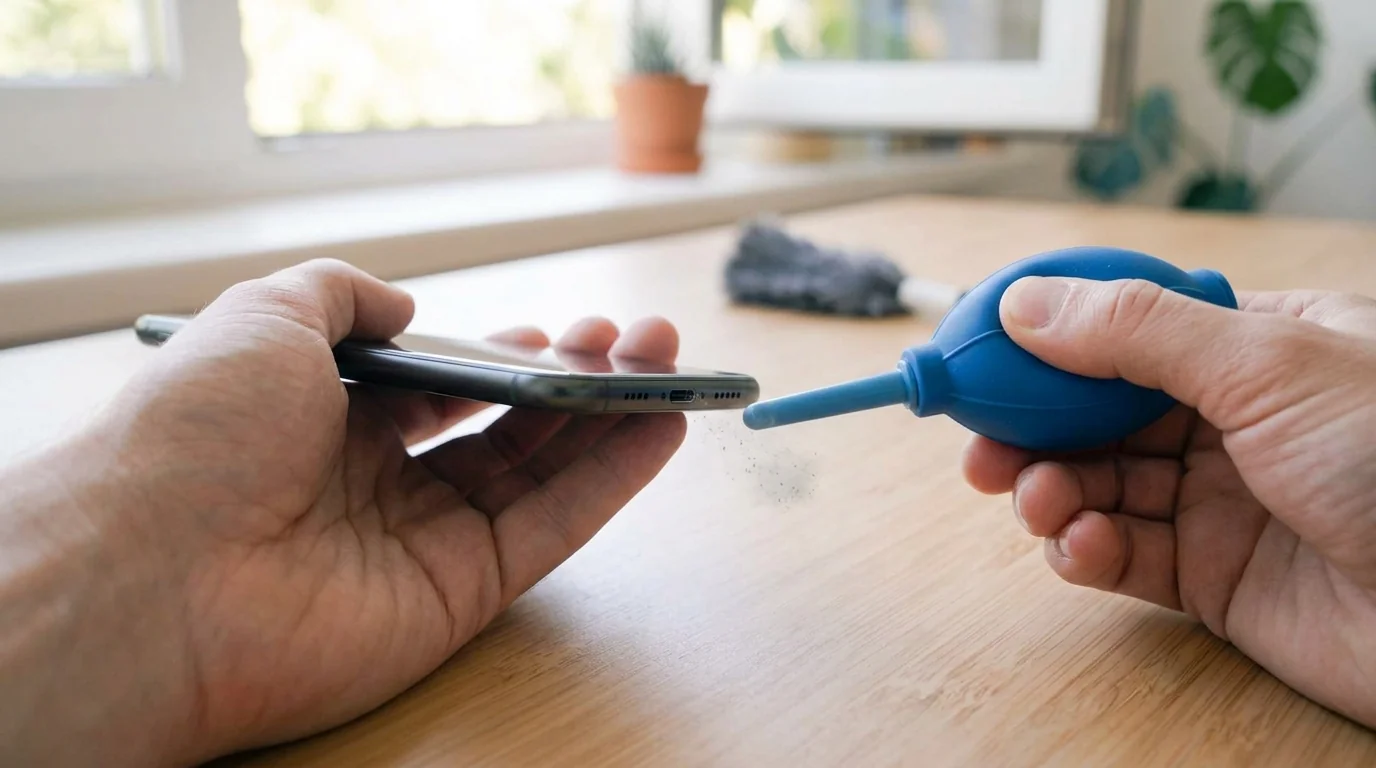
Begin with a hand-operated bulb blower, which gives you a way to move loose dust without canned air. Use gentle puffs, then inspect the opening again to see whether the particles have come away. This may be enough for loose debris, while compacted lint can remain stuck inside and need a different method.
Canned air is an optional, disputed choice. Asurion, OtterBox and other guides recommend brief pulses, but Consumer Reports relays Apple’s warning that compressed air can harm internal parts or push dirt farther into the device. If you choose a guide that permits it, keep the nozzle outside and away from the socket rather than inserting the straw.
TechRadar advises limiting an air pulse to no more than two seconds and avoiding excessive pressure. Keep that caution in mind, and never substitute blowing with your mouth, because your breath can introduce moisture. If the connector is wet or your iPhone reports liquid, skip compressed air entirely and use the separate drying instructions later in this guide.
4. Loosen Packed Lint With a Wooden or Plastic Pick
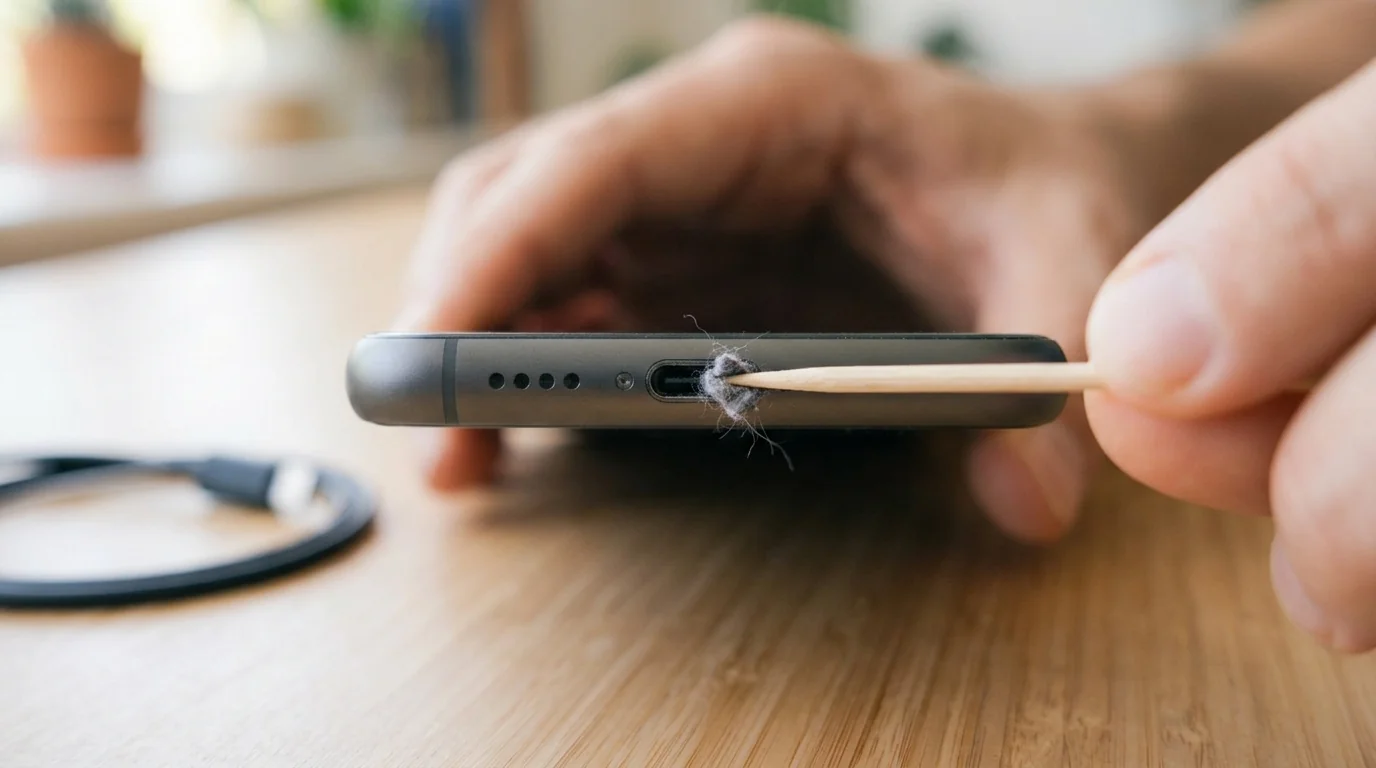
If you can still see compacted lint, some guides suggest gently removing it with a wooden or plastic pick. Work against the housing where the debris has collected, especially the rear wall, while staying away from the contact pins. For USB-C, Android Authority advises keeping your tool away from the contact-bearing face of the connector.
Keep the pressure light rather than digging harder when a piece resists. A pick can snap inside the socket, leaving you with another obstruction, and Asurion warns that sharp tools can damage fragile pins. Nonmetal tools reduce the risk of scratching or causing a short compared with metal implements, but they still need careful handling.
A repair forum answer on iFixit notes that a wooden pick may be too soft to loosen tightly compacted lint in a Lightning socket. The same iFixit answer suggests a plastic spudger when a wooden tip cannot loosen the buildup. That doesn’t mean you should keep pushing until something gives, so stop and get professional help if the debris cannot be removed gently.
5. Lift Sticky Grime With a Barely Damp Swab
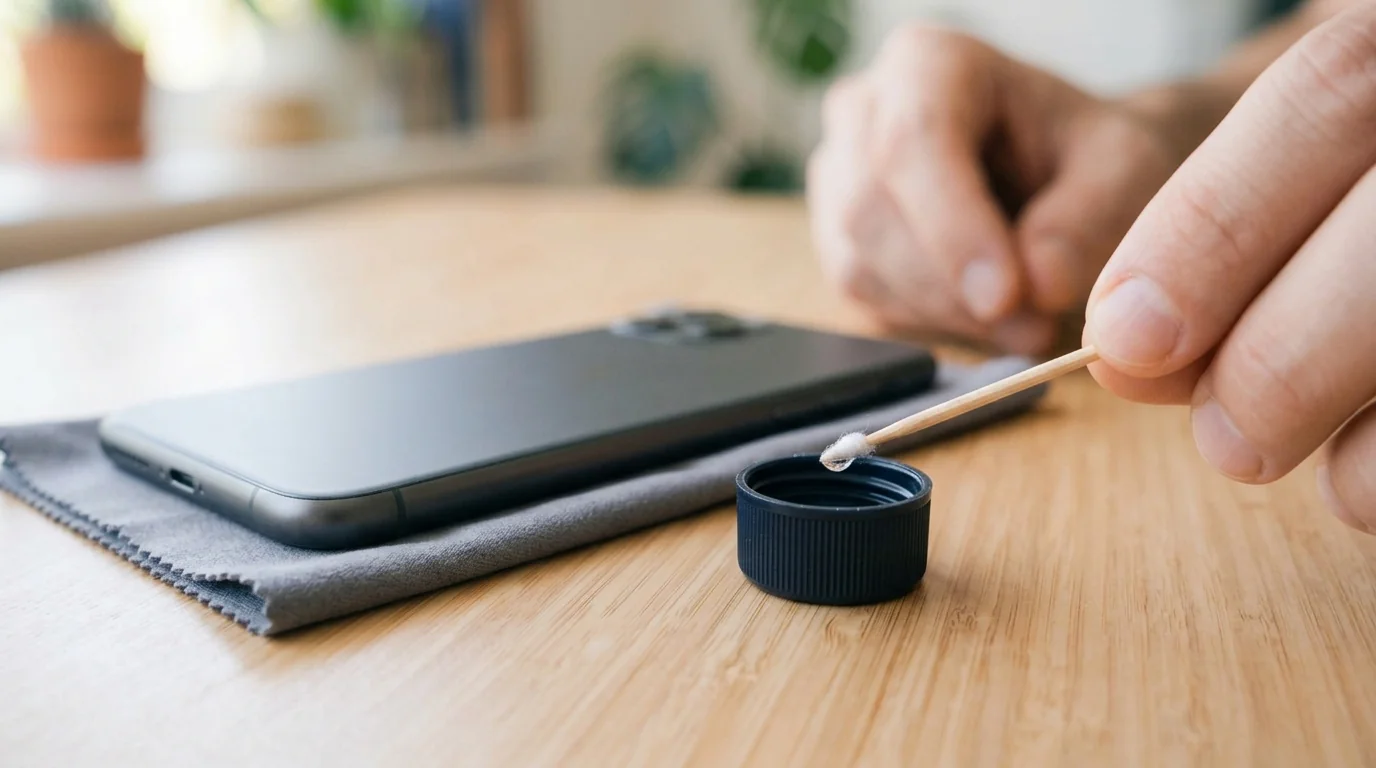
This step is optional and only worth considering for stubborn, stuck-on grime. TechRadar describes a small cotton-wrapped toothpick with a little isopropyl alcohol to help loosen debris. If you choose that method, use only enough cotton to make a small tip and keep it barely damp, never soaked with fluid or moistened with water.
You can then gently move the tip along the inner wall where the grime sits, keeping it away from the contacts. TechRadar presents alcohol-assisted cleaning as an optional method, so you can skip it if dry cleaning removes the debris. Your phone should remain switched off, and a flashlight can help you check whether the stuck material has actually been removed.
There is a reason to pause here, though. Asurion advises keeping rubbing alcohol and other liquids out, while both Asurion and OtterBox warn that cotton can leave fibers behind. If you prefer that no-liquid advice, skip this step and get help with grime that dry cleaning cannot remove gently, instead of adding more fluid or pressure.
6. Do a Final Air Pass and Let the Port Dry
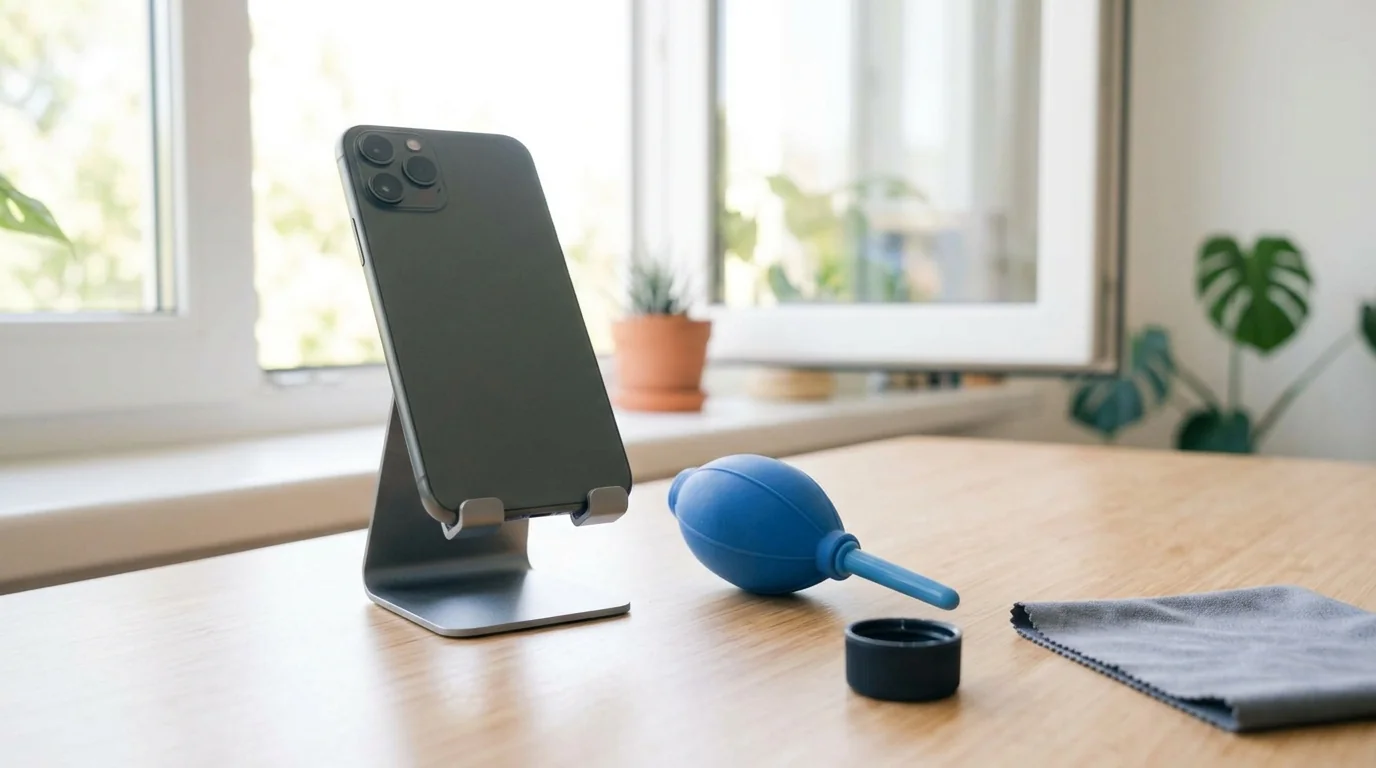
Inspect the socket again after loosening the debris. If you can see loose particles, use another gentle pass with your bulb blower to clear them away. Guides that permit canned air also describe a final brief pulse, but the warning about pressure and Apple’s objection still apply at this stage of the cleaning process.
Keep the cable disconnected while any cleaning moisture remains. TechRadar recommends another air pass to clear remaining particles and cleaning moisture, but doesn’t specify how long to wait after using alcohol. Keep your cable disconnected while the socket remains damp rather than relying on a fixed waiting time.
A moisture alert needs its own drying process rather than repeated cleaning. For a wet iPhone, Apple advises airflow and specifically rejects external heat, compressed air and objects inserted into the connector. Don’t use a hair dryer to hurry things along either, because the Samsung guidance warns that heat can damage the phone and loosen its panel adhesives.
7. Plug In, Check the Fit and Test Charging
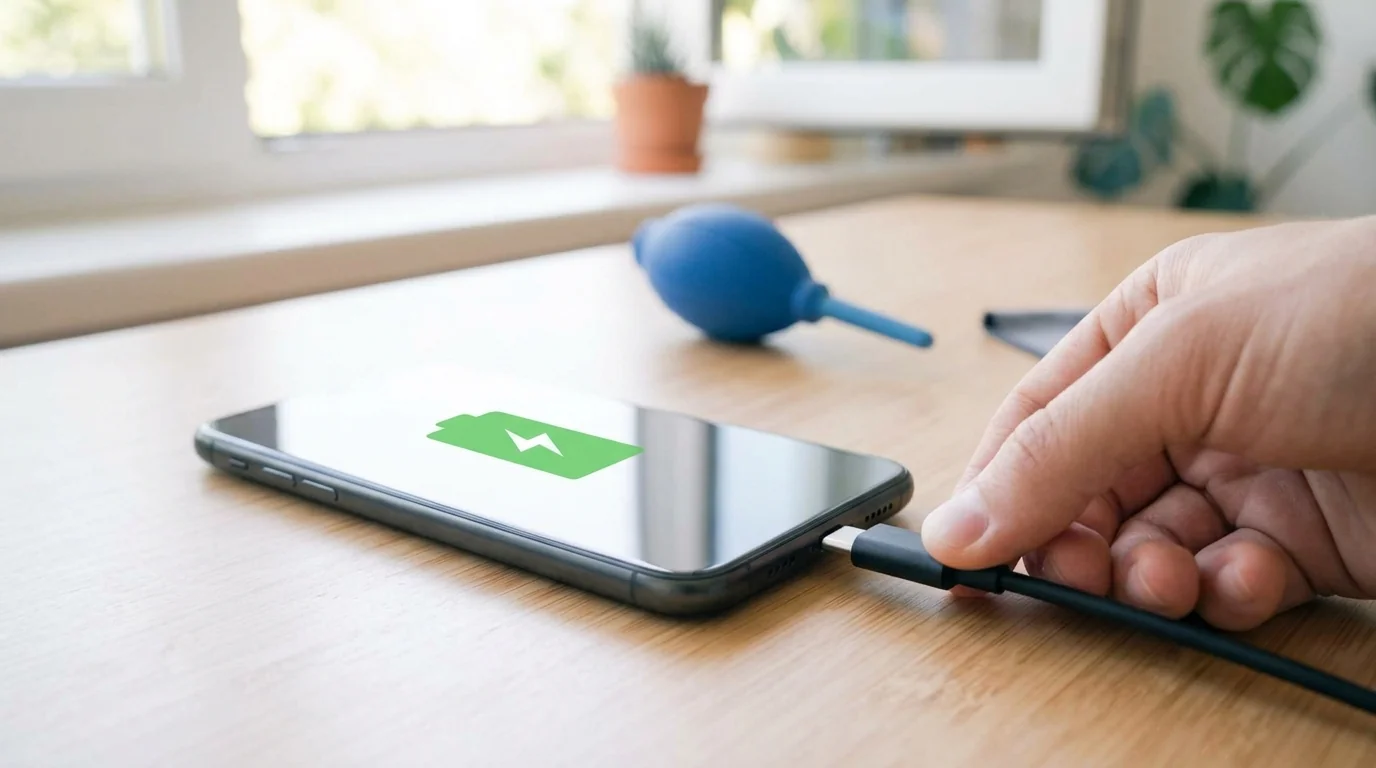
Once the connector is dry, turn your phone back on and reconnect your charging cable. The plug should seat fully, click into place and remain secure instead of leaning or falling out. On a Lightning cable, check that its plastic collar sits flush against the phone rather than leaving the gap associated with packed lint.
Now check whether charging works without holding the cable at a particular angle. A better fit and a steady charging connection suggest that removing debris helped, though cleaning is not a guaranteed repair. If your iPhone is still unresponsive, Apple’s troubleshooting instructions include leaving it connected to power for half an hour before taking the next action.
If the plug still won’t seat cleanly, stop and get help rather than pushing it harder. If it fits properly but charging remains unreliable, check another cable, adapter or outlet and try restarting your phone. A damaged socket, faulty accessory or battery problem may need further inspection, which we’ll cover in the later troubleshooting section.
Compressed Air, Alcohol and Cotton Swabs – Why the Advice Conflicts
You can read one cleaning guide and find a tool recommended, then open another and see it rejected. Why the disagreement? The same method that removes debris can introduce another problem, so knowing the cautions helps you decide when to stop.
Compressed Air
Asurion and OtterBox recommend canned air for removing loose debris, while TechRadar and Tom’s Guide also include air in their cleaning instructions. But Consumer Reports relays Apple’s warning that compressed air can damage internal components or drive dirt farther inside. That leaves you with conflicting advice, rather than a method every source agrees on. The pressure matters, and simply turning your phone off doesn’t remove that concern.
Start with a hand-operated bulb blower and gentle puffs, an option described by Asurion and TechRadar. If you choose canned air, keep the nozzle outside the socket and use brief pulses instead of sustained pressure. TechRadar advises keeping each pulse within two seconds, while OtterBox warns against inserting the straw. For a wet iPhone connector, Apple’s instructions are explicit, so skip compressed air and let the phone dry with airflow.
Isopropyl Alcohol
TechRadar suggests a little isopropyl alcohol on a small cotton-wrapped tip as an optional way to loosen stubborn grime. Asurion advises against introducing liquids, including rubbing alcohol, and Android Authority’s writer also recommends avoiding liquids and chemicals. OtterBox discusses rubbing alcohol for the phone’s exterior, which is a different use from placing it inside your charging socket. An exterior-cleaning recommendation doesn’t give you permission to wet the contacts.
For your starting method, keep the inside dry and leave alcohol out. If you decide to follow TechRadar’s optional method for stuck-on grime, the tip should be barely damp, never soaked, and you should never substitute water. Keep your phone off and leave the cable disconnected while cleaning moisture remains. If you prefer the no-liquid advice, skip alcohol entirely and have stubborn material removed professionally rather than adding more fluid.
Cotton Swabs and Toothpicks
Consumer Reports quotes a former uBreakiFix manager who suggests a toothpick or cotton swab, and TechRadar describes making a small cotton-tipped pick. OtterBox and Tom’s Guide recommend toothpicks too, with Tom’s Guide specifying wood or plastic. Yet Asurion warns that picks can damage pins or break, and both Asurion and OtterBox caution that cotton can shed fibers inside. A tool that removes lint can leave another obstruction behind.
Begin with inspection and gentle air, then consider a nonmetal pick only for visible debris that remains. If you use one, work lightly against the housing and keep away from the contacts, as Android Authority advises. A plastic spudger is another option mentioned in an iFixit repair answer, but it still calls for care. Skip cotton by default, and stop when removing the buildup would require force, because professional cleaning is the next sensible step.
Cleaning the Port After Water or a Moisture Warning
A wet charging port needs drying, rather than the lint-removal routine you’ve just read. If your phone reports moisture, disconnect the charging cable and give it time to dry. You see, getting the cable to fit won’t solve a liquid problem. For more on how much water an iPhone can handle, read our look at whether the iPhone 16 is waterproof.
iPhone Liquid Detection Alert
If you use an iPhone XS, XS Max, XR or a later model, your phone can warn you about liquid in its Lightning or USB-C connector, cable or accessory. The alert blocks wired charging and accessory connections until the affected parts are dry. Unplug the cable from your phone and disconnect its other end from the charger or accessory. With the connector pointing downward, gently tap your phone against your hand to help excess liquid leave the opening.
Leave your iPhone somewhere dry where air can circulate, then try reconnecting after at least 30 minutes. If the alert returns, continue drying, because moisture can remain inside and the process may take up to 24 hours. Apple offers an emergency override when you reconnect, but charging a wet connector can corrode the pins and cause permanent connection problems, so that option carries a real risk. You can instead use a Qi-certified wireless charger if your phone’s back is dry.
Samsung Moisture Detected Warning
Most Galaxy phones don’t have a cover over the USB opening, and moisture detection can stop wired charging when liquid gets inside. Use a soft cloth to dry your phone and the port area, taking care around the connectors. Let your device rest until it is completely dry before trying to recharge it. If your phone was submerged, don’t assume a quick wipe means the moisture inside has gone.
If the warning remains after drying, SamMobile suggests clearing the USB app’s cache because the warning can remain stored. Open your phone’s system menu, go to Apps and use the filter to show system apps, then select USBSettings. Open Storage and choose Clear cache, keeping this software check separate from drying a genuinely wet port. If the warning continues, use wireless charging if supported and have a Samsung specialist check for hardware damage.
What Not to Do With a Wet Port
Don’t put your iPhone in rice, because small particles can enter the device and cause damage. Skip hair dryers and other external heat sources too, since hot air can damage your phone and loosen the adhesives holding its panels together. Apple also advises against compressed air when drying an iPhone connector. A method suggested for loose dust isn’t automatically suitable for removing liquid.
Keep cotton swabs, paper towels and other inserted objects out of a wet iPhone port, following Apple’s drying instructions. Leave wired charging disconnected until both your phone and cable are dry, rather than repeatedly reconnecting to see whether the warning has disappeared. If one particular cable keeps triggering the alert when everything is dry, that accessory may be damaged. Repeated alerts with dry Apple cables or accessories can mean your phone needs service, so stop treating the problem as leftover moisture alone.
Still Not Charging After Cleaning? What to Check Next
You’ve removed the lint, but your phone still refuses to charge. That doesn’t prove the cleaning failed, because a cable, power source or software fault can produce similar trouble. Work through these checks before deciding your charging port needs repair. For iPhone-specific fixes, our guide to an iPhone that’s not charging goes further.
Test Another Cable, Adapter and Outlet
Examine your cable ends for fraying and your power adapter for broken or bent prongs. TechRadar notes that wires inside a charging cable can break too, so trying another cable is useful even after an inspection. Stop using damaged accessories, check that each connection is secure and test another wall outlet. You can also try a computer as a power source.
If your iPhone reports that an accessory isn’t supported or certified, Apple recommends connecting directly to the charger without additional adapters. That alert can come from a dirty or damaged port, a defective accessory or a USB charger unsuitable for your device. Try another cable or charger rather than assuming the socket is responsible, and check that your iPhone has the latest iOS version.
Restart and Check for Software Limits
Restart your phone, because software glitches can interfere with charging. For an unresponsive iPhone, Apple’s instructions include charging for 30 minutes before a force restart. If the screen stays dark, follow our steps for an iPhone that won’t turn on. If you have an iPhone 8 or newer, or an SE model from generation two onward, tap the volume-up button once, tap volume-down next, then keep the side button pressed until you see Apple’s logo on the screen. Leave it charging for another 30 minutes afterward.
If your iPhone charges but pauses around 80 percent, a charging feature may explain it. Optimized Battery Charging on iOS 13 and later can delay completing the charge beyond that point, while iPhone 15 and later models can stop at a chosen charge limit. Check those options in your phone’s system menu before treating the pause as evidence of a blocked socket. If your phone also feels warm, our guide on why your phone gets so hot covers the common causes.
Signs the Port Itself Is Damaged
Pay attention to a plug that still feels loose or needs an odd angle after visible debris has been removed. Corrosion, dark patches and a phone that fails to detect your charger are other reasons to suspect damage. A history of dropping your phone or bending the port housing adds another reason to get it checked. These clues deserve inspection, rather than repeated scraping.
You still need to separate symptoms from a confirmed diagnosis. A faulty cable can cause charging failure, and trapped lint can create poor fit, so test another accessory before deciding the port is broken. Asurion notes that the socket connects directly to the motherboard on many devices. Serious damage can therefore require replacing the whole device, which is another reason to avoid forcing a plug or cleaning tool.
When to Hand It to a Repair Shop
Stop if your charger won’t click into place cleanly, particularly after you’ve removed the debris you can safely reach. Asurion recommends professional port cleaning or replacement when the connector cannot seat properly. Consumer Reports lists an Apple Store, Best Buy or uBreakiFix as places to seek help when you’re unsure or the problem continues. Let a technician assess it before trying harder scraping.
If your cable appears sound but charging still fails, TechRadar recommends having a technician check the battery. You can use wireless charging meanwhile if your phone supports it, as Asurion suggests when a dirty port prevents cable use. That gives you another charging option while you arrange an inspection. If the battery also drains quickly after an update, see our guide to iOS 27 battery drain. The useful next move is finding the cause, rather than repeating a cleaning step that hasn’t solved the fault.
How to Keep Lint Out of Your Charging Port
Once your cable fits properly again, a few habits can help keep dirt from building up inside. You don’t need to keep poking around in a clean socket. Pay attention to where you carry your phone and how you protect the opening.
Habits That Keep the Port Clean
- Choose a close-fitting case: Look for a case that sits snugly against your phone to reduce dirt collecting between them, or one with a cover that closes over the charging opening.
- Consider a soft silicone plug: These inexpensive plugs close off your USB-C socket when you aren’t charging, and they’re often sold with small brushes, although brush bristles can lodge inside a port.
- Watch your pockets and bags: Avoid carrying your phone in pockets full of lint or placing it directly into a bag containing loose dirt, where fibers and particles can enter the opening.
- Cover the port around sand: Use a dust plug in sandy places, as Asurion recommends, to help keep particles out while your charging socket would otherwise remain exposed.
- Check with a flashlight occasionally: Look inside now and then, especially if your cable begins fitting differently, and check for visible lint or dirt before deciding whether anything needs removing.
- Use wireless charging while it’s dirty: If your phone supports it, wireless charging gives you another option while you arrange cleaning, so you can leave a poorly fitting cable out of the socket. Our list of ways to charge your phone without a charger has more backup options.
Watch for Changes in Fit
You see, the plug itself can press trapped lint farther inside each time you connect it. If your cable starts sitting crooked or slipping out again, inspect the opening rather than forcing it into place. Keeping dirt out helps, but a change in fit still deserves attention.
Remember that protecting your port and cleaning it are separate jobs. A plug or cover helps limit what gets inside, while a flashlight helps you decide whether cleaning is needed. If you cannot remove visible buildup gently, professional cleaning is still an option.
Keep dirt away, check the fit and clean only when needed.
FAQs
Yes, you can use a hand-operated bulb blower to move loose dust out. For visible lint that remains stuck, some guides suggest careful removal with a wood or plastic tool. Keep clear of the contacts and stop if gentle pressure isn’t enough.
You shouldn’t treat alcohol as safe for every charging port, because the cleaning guides disagree. TechRadar permits an optional tip lightly moistened with isopropyl alcohol, while Asurion recommends avoiding liquids. Keeping the socket dry is the more cautious starting choice.
Visible lint blocking the plug suggests dirt, while corrosion or a bent socket gives you reason to suspect damage. A loose cable or charging at an angle can happen with either problem, so those symptoms alone cannot settle it. If careful cleaning and another cable don’t help, arrange an inspection.
Your phone may have trapped debris, a damaged socket, a faulty charging accessory or a software problem. Check the plug’s fit, try another cable and power source, then restart your phone. A moisture warning or an iPhone charging limit can also prevent charging from continuing.
Check occasionally and whenever your cable starts fitting poorly or charging becomes unreliable. The guides don’t establish a fixed inspection interval. Even a fairly new phone can collect lint, so don’t use its age as a reason to skip checking.
Stop cleaning and get professional help with the broken piece. Don’t try to force it out with a needle, paper clip or metal tweezers, because those tools can damage the contacts. Keep your phone off while you arrange help.
Final Word
You don’t have to start with a repair when your charging cable stops fitting properly. Turn your phone off, inspect the socket with a flashlight and try gentle air before touching anything inside. If visible lint remains, some guides permit careful removal with a nonmetal pick, provided you keep away from the contacts and avoid force. Once the opening is clear and dry, reconnect and check the fit.
A wet connector needs a different next step. Disconnect your cable and follow the drying guidance for your phone, rather than scraping inside or applying heat. Wait until your phone and cable are dry before returning to wired charging.
If the plug still won’t seat cleanly, leave further cleaning to a professional. If it fits but charging remains unreliable, move through the cable, adapter, power-source and restart checks instead. Start with what you can see, let each check guide the next action and keep dirt away from the opening afterward. That gives you a clear way forward without pushing harder on a fragile socket.
